
Home made ski surface fix ll.
Insert: 31.12.2013
While the first
part was
rather a
introduction to
the subject, the second
part is
devoted to the
cutout
base,
which
can be done
with
a
little resolve
at home.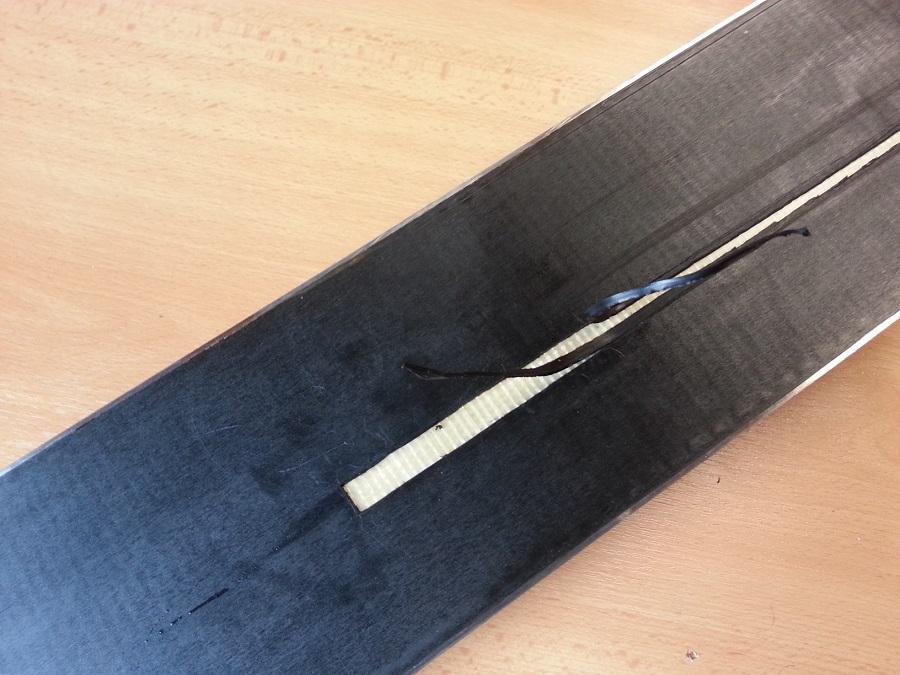
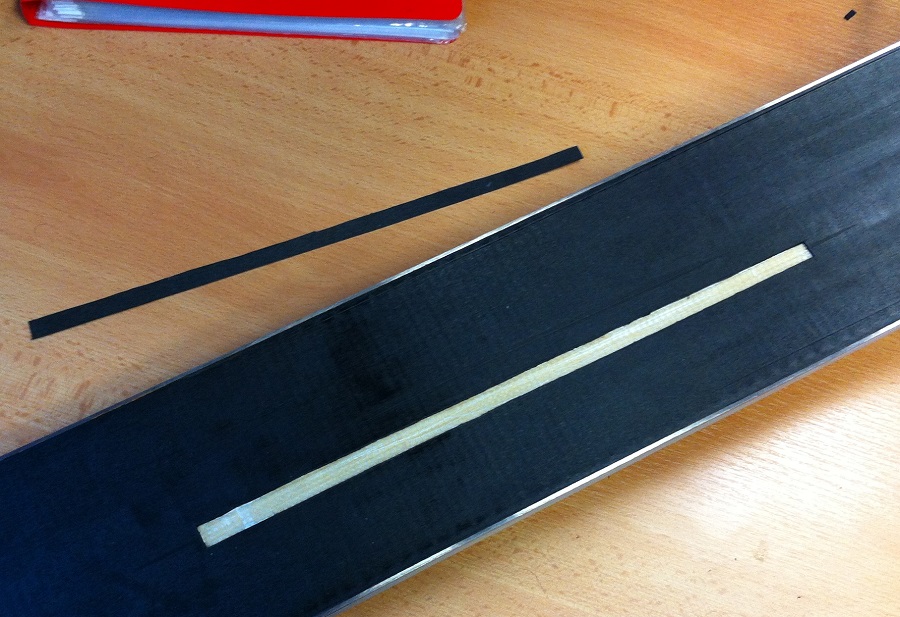
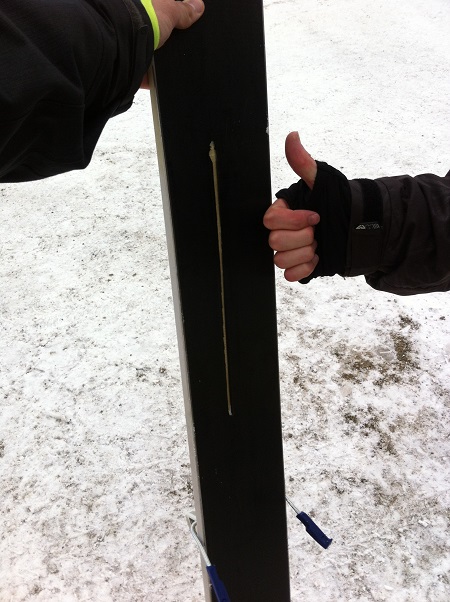
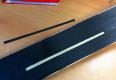
Both two cases of "home solutions" is preceded by thorough cleaning grooves. It is necessary to determine how much the base peeling off from the core around affected place. Then it is necessary cut this scaling base. For the base trim is okay to use a sharp trimming knife (one of those slide-out) or sharpened scalpel. It is useful to choose such a shape, that we could cut the same shape from the new base. Alternatively, it is possible to cut out a rough rectangle from a new base and do it by the slice, it is up to each individual likes. The thickness of the base at the freeride ski brands in Europe is usually about 1.3 mm (such rest of base we could get in a ski service with a bit of goodwill).
Anyway, it is necessary to measure the thickness of our base and then accordingly look for the new base. Personally, I did cut out on the base 1.31 mm, to be exact. So this was not a problem patch the base. If you have a base called "fatty base" (K2, movement, Line and many others), I have to admit that I do not know where to get this kind of thick base. I'm sure there is something. If I did not get this way a thick surface I would probably sort out this by underlay the length of the cut-out for epox y permeable material (this would depend on how many "missing"). Anyway epoxy pervades perfectly matte papers or any natural fabric, rice paper, glass fiber ...
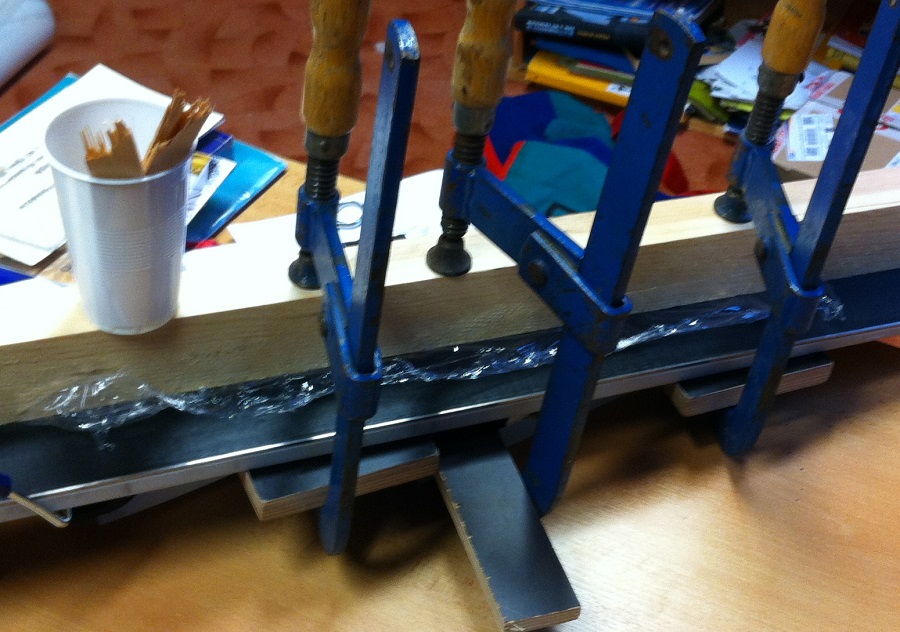
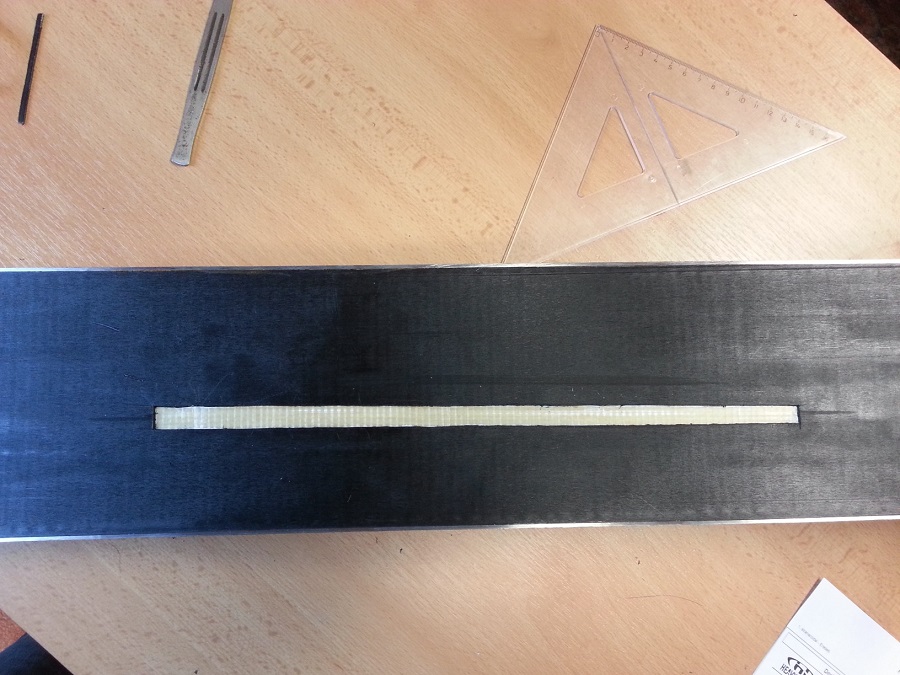
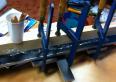
If I've ready the cut and the base, can proceed to gluing. I mix the epoxy adhesive and ruddle the cut in the base, crushes prepared piece of a base. The I cover the place by a film to do not stick to the ground, against which I will clip. Now attach a necessarily long, hard enough a straight piece of wood chip and tighten again through the pads on the other side of the ski. Stapling time depends on the type of epoxy adhesive.
Epoxy adhesives are available in drug stores, the Internet, home needs and the like. There are several kinds . They are usually made from two components - the filler and hardener, and may be transparent or colored. Generally, the longer the epoxy hardens , the stronger is hardened. Epoxy adhesive which is hard in 20 minutes, will have for this purpose a sufficient strength ( e.g., about 130-150 kg/cm2) . Personally, I used the epoxy, we have been home for some time.It is also a two-part, but all I know about it is the fact that it sticks very well and solidifies within 12 hours. The base is mostly PE, with teflon coating. Accurate chemical composition unfortunately I do not know , but the important thing is that from the side that sticks to the ski, has such arrangements to be bondable adhesive based on epoxy resins , which are usually ( maybe never ) does not stick teflon or PE . It follows that the choice of epoxy glue here so I was not afraid. It follows that I wouldn't be afraid from the choice of the epoxy glue.
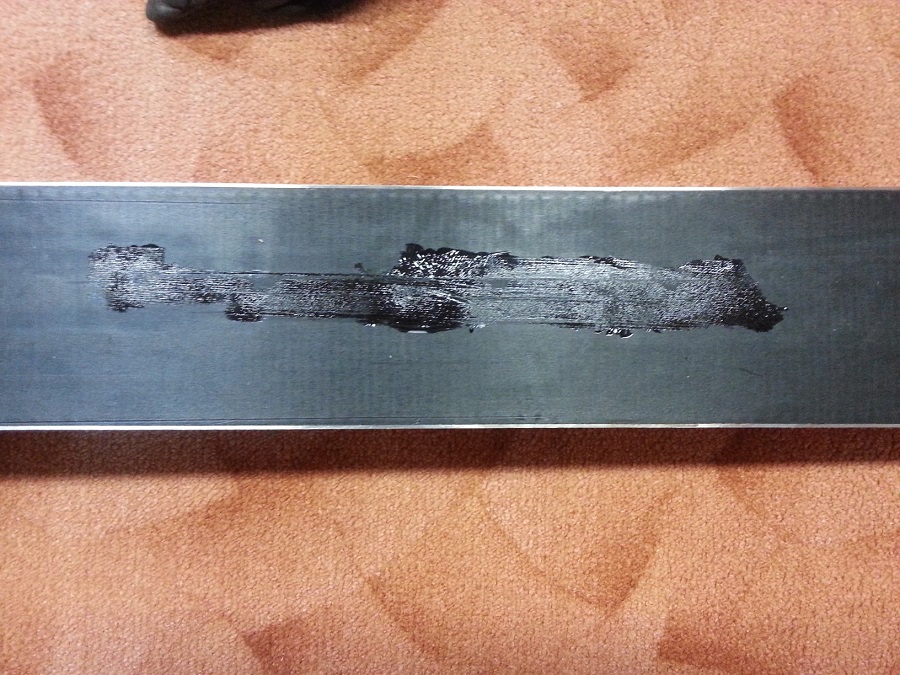
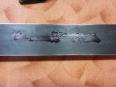
After a time, which is necessary for the harden, we take out the ski from clip and sanded the patched places. Epoxy will be displaced to the surrounding area of the patches and needs to be sanded. One can use a wider chisel or knife to scrape and then some sand paper. It can be grinded either manually or pressure oscillating grinder that is definitely faster than the manual option.
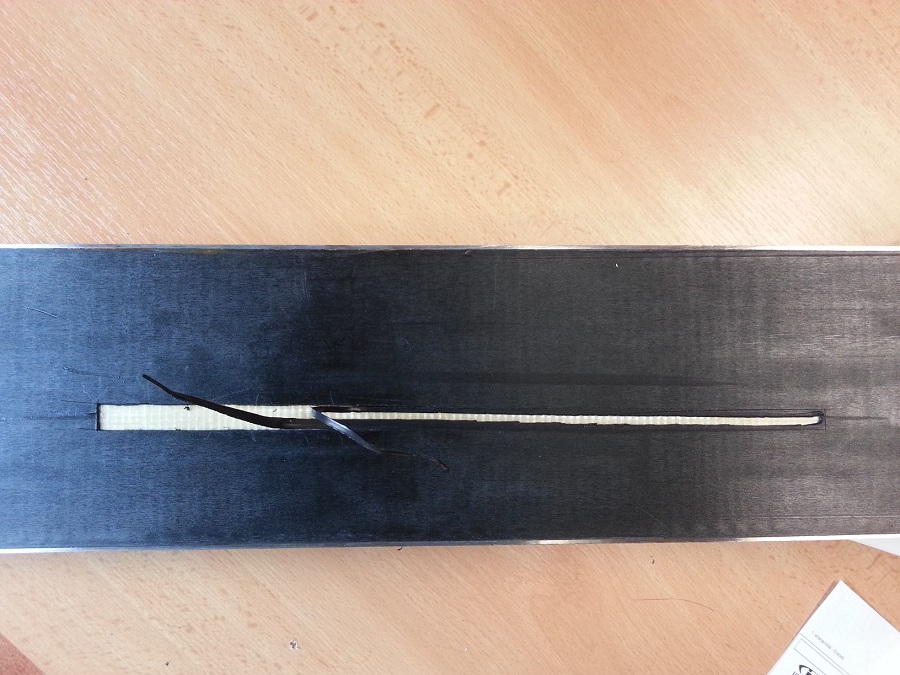
Note: It is good to do a cutout in the way that the shape of the cutout demarcate with a ruler or other straight stuff. Thanks that will be the cut regular. The actual cutting of the grooves, we provide until you hear the scraping sound of the core of the ski. Just one of the must not be afraid and must push properly. When the patch is not exactly flush, so it does not matter, small crevice will be filled by epoxy.
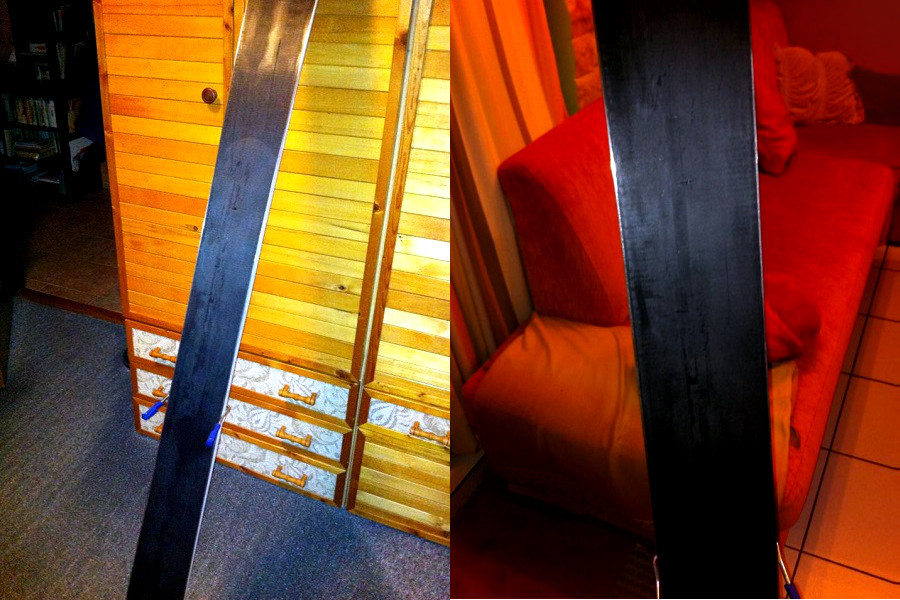
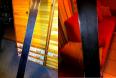
The whole process is captured on the images from making a gash to his corrected. Maybe a description of the procedure may seem somewhat complicated and someone tells that it can be better give it to the ski service, but the seeming can be deceiving. Total work (if I don't count the time in clips) take about 30 to 45 min - cut out, get ready base, sticking a new piece, clipping, take out from clips and abrasion. And it was a pretty long gash - 31 cm.
Author: Pavel Božák
Anyway, it is necessary to measure the thickness of our base and then accordingly look for the new base. Personally, I did cut out on the base 1.31 mm, to be exact. So this was not a problem patch the base. If you have a base called "fatty base" (K2, movement, Line and many others), I have to admit that I do not know where to get this kind of thick base. I'm sure there is something. If I did not get this way a thick surface I would probably sort out this by underlay the length of the cut-out for epox y permeable material (this would depend on how many "missing"). Anyway epoxy pervades perfectly matte papers or any natural fabric, rice paper, glass fiber ...
If I've ready the cut and the base, can proceed to gluing. I mix the epoxy adhesive and ruddle the cut in the base, crushes prepared piece of a base. The I cover the place by a film to do not stick to the ground, against which I will clip. Now attach a necessarily long, hard enough a straight piece of wood chip and tighten again through the pads on the other side of the ski. Stapling time depends on the type of epoxy adhesive.
Epoxy adhesives are available in drug stores, the Internet, home needs and the like. There are several kinds . They are usually made from two components - the filler and hardener, and may be transparent or colored. Generally, the longer the epoxy hardens , the stronger is hardened. Epoxy adhesive which is hard in 20 minutes, will have for this purpose a sufficient strength ( e.g., about 130-150 kg/cm2) . Personally, I used the epoxy, we have been home for some time.It is also a two-part, but all I know about it is the fact that it sticks very well and solidifies within 12 hours. The base is mostly PE, with teflon coating. Accurate chemical composition unfortunately I do not know , but the important thing is that from the side that sticks to the ski, has such arrangements to be bondable adhesive based on epoxy resins , which are usually ( maybe never ) does not stick teflon or PE . It follows that the choice of epoxy glue here so I was not afraid. It follows that I wouldn't be afraid from the choice of the epoxy glue.
After a time, which is necessary for the harden, we take out the ski from clip and sanded the patched places. Epoxy will be displaced to the surrounding area of the patches and needs to be sanded. One can use a wider chisel or knife to scrape and then some sand paper. It can be grinded either manually or pressure oscillating grinder that is definitely faster than the manual option.
Note: It is good to do a cutout in the way that the shape of the cutout demarcate with a ruler or other straight stuff. Thanks that will be the cut regular. The actual cutting of the grooves, we provide until you hear the scraping sound of the core of the ski. Just one of the must not be afraid and must push properly. When the patch is not exactly flush, so it does not matter, small crevice will be filled by epoxy.
The whole process is captured on the images from making a gash to his corrected. Maybe a description of the procedure may seem somewhat complicated and someone tells that it can be better give it to the ski service, but the seeming can be deceiving. Total work (if I don't count the time in clips) take about 30 to 45 min - cut out, get ready base, sticking a new piece, clipping, take out from clips and abrasion. And it was a pretty long gash - 31 cm.
Author: Pavel Božák